
.png)
Setting up Inventor Projects
- Jatin Soni
- Apr 27, 2020
- 1 min read

Projects are used in Autodesk Inventor to allow the program to quickly find all the files you are working with. This also allows us to use a separate library for common parts, such as Screws, Washers, Bearings, etc. It is extremely important that you setup your project before starting the season or offseason or even a CADathon.
1. Make sure you download at least the “MVRT2020.ipj” file from GrabCAD before starting this. (You don’t need to download the other files for now)
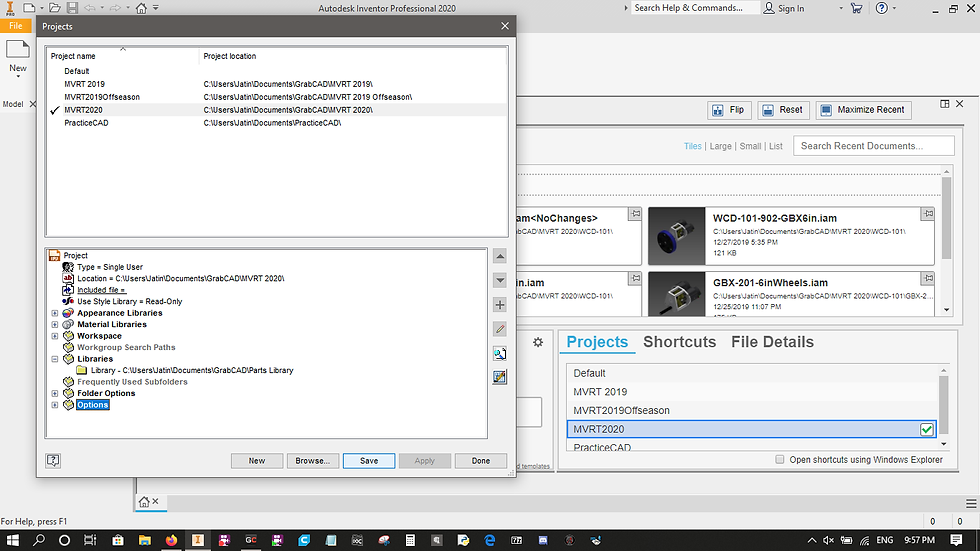
2. Click on the Projects button on the top-left corner of Inventor when you start it up. (Make sure no files are open in inventor otherwise it won’t allow you to change your projects!)

3. In the Projects pop-up box, click on the Browse button near the bottom of the window.

4. Navigate to the folder “MVRT 2020” (you need to download at least the “MVRT2020.ipj” file from GrabCAD for this step)
5. Select the “MVRT2020.ipj” file in the folder (the one with the orange logo as seen in picture below)

6. In the options below, open (click the plus sign) Libraries and right-click the long line so that you see the option to edit
7. Click Edit

8. You should now see a folder and magnifying glass symbol to the right of the file path. Click on this symbol.

9. Now browse to the GrabCAD folder and select the “Parts Library” folder (as shown) and click Ok.

10. Now make sure that the file path under libraries shows a location on your computer, and hit Save and that’s it! This allows other users to open your files without errors since everyone’s using a common library.
Comments